Hunt Giant Fish Beginner Guide: First Tank Progression Route
Hunt Giant Fish Beginner Guide maps your first catch, tank income, weapon upgrades, and Evolution-area decisions into a safe route without invented costs.
This hunt giant fish beginner guide focuses on a first-session route. It starts with what the accepted evidence actually supports, then turns those limits into a practical route you can use in the current server. Exact costs, rates, and hidden rules are left out unless they are visible in the official record.
Use the official Roblox experience as the safest starting point before following an older community route.
Your first loop from weapon to tank
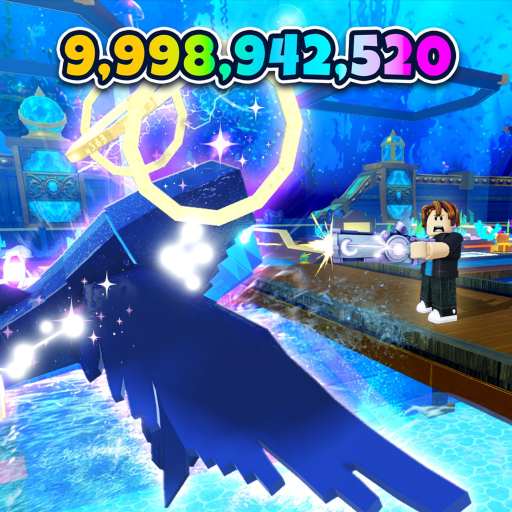
The stable starting point is simple: Equip a weapon and tap to defeat a fish. Carry the catch to your personal tank. That tells us what can be used as a real decision anchor without turning missing data into a ranking or a promise.
Confirmed points for this page include:
-
Equip a weapon and tap to defeat a fish.
-
Carry the catch to your personal tank.
-
Let tank fish generate passive coins.
-
Use upgrades to reach bigger, stronger, and rarer targets.
-
Use the Evolution area when the live game makes it available.
The video below is included as supporting gameplay context. Use it to recognize the flow and interface, then compare every update-sensitive detail with the server you actually joined.
A safe first-session order
Work through the process in order. Do not skip the verification step just because a guide or video sounds certain:
-
Finish the current tutorial prompts before wandering away.
-
Catch a target your equipped weapon can handle consistently.
-
Bank the catch in your tank instead of carrying it around a busy server.
-
Claim visible income and compare the next live upgrade cost with your reserve.
-
Change one system at a time: weapon, tank, or evolution.
The game is still labeled beta on its official page, so interface wording and balance can move. Treat a live label as stronger evidence than a remembered number. If a menu, requirement, or reward differs from this guide, follow the current interface and record the difference before making another purchase or committing another catch.
Beginner checkpoints that matter
Use this table as a live worksheet. It deliberately asks for observable information instead of supplying values that may already be stale.
| Checkpoint | What to inspect | Decision |
|---|---|---|
| Tutorial | Follow the live prompts | New Hunter marks tutorial 1 completion |
| First catch | Use repeated taps with a weapon | Confirm the fish reaches inventory |
| First tank slot | Deposit the catch | Watch for passive coins |
| Reinvestment | Check a weapon or tank upgrade | Keep a reserve instead of emptying the balance |
Think in terms of bottlenecks instead of rarity alone. Ask whether the problem is damage, travel, storage, income, event timing, or uncertainty about a requirement. Once the bottleneck is named, the next action becomes smaller and easier to judge. This also prevents two unrelated upgrades from hiding which change actually helped.
Where to go after the tutorial
Several details still need a current in-game or creator-owned source before they should be treated as settled:
-
Exact weapon prices and damage values
-
Tank capacity at each level
-
Fish income rates and evolution multipliers
Protect the basic loop while experimenting. You should still be able to defeat a manageable fish, return it to the tank, and collect passive coins after a test. If a choice consumes every resource but does not create a visible new opportunity, stop and rebuild the reserve before trying another uncertain option.
When you confirm one of these points, save the exact label, date, and screen that supports it. A clear small record is more useful than a long list assembled from mismatched versions. For broader progression context, continue through the site's real category pages rather than relying on an unverified external shortcut.
Screenshots and videos are most useful for locating a menu or understanding a sequence, not for freezing a price forever. Compare them with the current server. Names, buttons, stock, timers, and costs are all update-sensitive, while the official core loop provides the stable frame for deciding what to inspect next.
A useful decision here is the one you can verify immediately. Keep the target, server, and surrounding setup as consistent as possible, change one thing, and then look for a visible result. That approach is slower than copying a confident tier list, but it protects your coins and keeps the conclusion tied to the current build rather than an old screenshot.
The game is still labeled beta on its official page, so interface wording and balance can move. Treat a live label as stronger evidence than a remembered number. If a menu, requirement, or reward differs from this guide, follow the current interface and record the difference before making another purchase or committing another catch.
Think in terms of bottlenecks instead of rarity alone. Ask whether the problem is damage, travel, storage, income, event timing, or uncertainty about a requirement. Once the bottleneck is named, the next action becomes smaller and easier to judge. This also prevents two unrelated upgrades from hiding which change actually helped.
Protect the basic loop while experimenting. You should still be able to defeat a manageable fish, return it to the tank, and collect passive coins after a test. If a choice consumes every resource but does not create a visible new opportunity, stop and rebuild the reserve before trying another uncertain option.
Screenshots and videos are most useful for locating a menu or understanding a sequence, not for freezing a price forever. Compare them with the current server. Names, buttons, stock, timers, and costs are all update-sensitive, while the official core loop provides the stable frame for deciding what to inspect next.
A useful decision here is the one you can verify immediately. Keep the target, server, and surrounding setup as consistent as possible, change one thing, and then look for a visible result. That approach is slower than copying a confident tier list, but it protects your coins and keeps the conclusion tied to the current build rather than an old screenshot.
For this a first-session route, keep one final audit note: write down what you observed before acting, what changed afterward, and which value came directly from the current interface. This makes the next comparison cleaner and gives you a reliable way to notice when an update has changed the rule.
For this a first-session route, keep one final audit note: write down what you observed before acting, what changed afterward, and which value came directly from the current interface. This makes the next comparison cleaner and gives you a reliable way to notice when an update has changed the rule.
FAQ
What should I do first?
Follow the tutorial, defeat a manageable fish, and place it in your tank before chasing harder targets.
Should I upgrade the tank or weapon first?
Compare the live bottleneck. Upgrade damage when fish take too long; protect tank progress when storage or income is the constraint.
When should I use Evolution?
Use the Evolution area after it is available and after you understand which catch you are committing. Exact requirements can change.